Category: Floor Tiles

Simple DIY techniques to clean your floor tiles

Floor tiles flooring may last a lifetime if properly maintained. Fortunately, in comparison to certain other forms of flooring, floor tiles require very little care. To keep the floor clean and gleaming, all you need is warm water, a little amount of soap or cleaning agent, and a chamois mop or cloth.

How Frequently Should Floor Tiles Be Cleaned

At least twice a week, floor tiles should be “dry cleaned,” or swept or vacuumed, to remove the gritty particles that may diminish the floor tiles’ gloss. Every two weeks, wet clean or mop the floor tiles in the kitchen, and once a week in the bathroom. Once every two to three months, spot-clean the grout.

Ceramic or Porcelain Floor tiles Cleaning

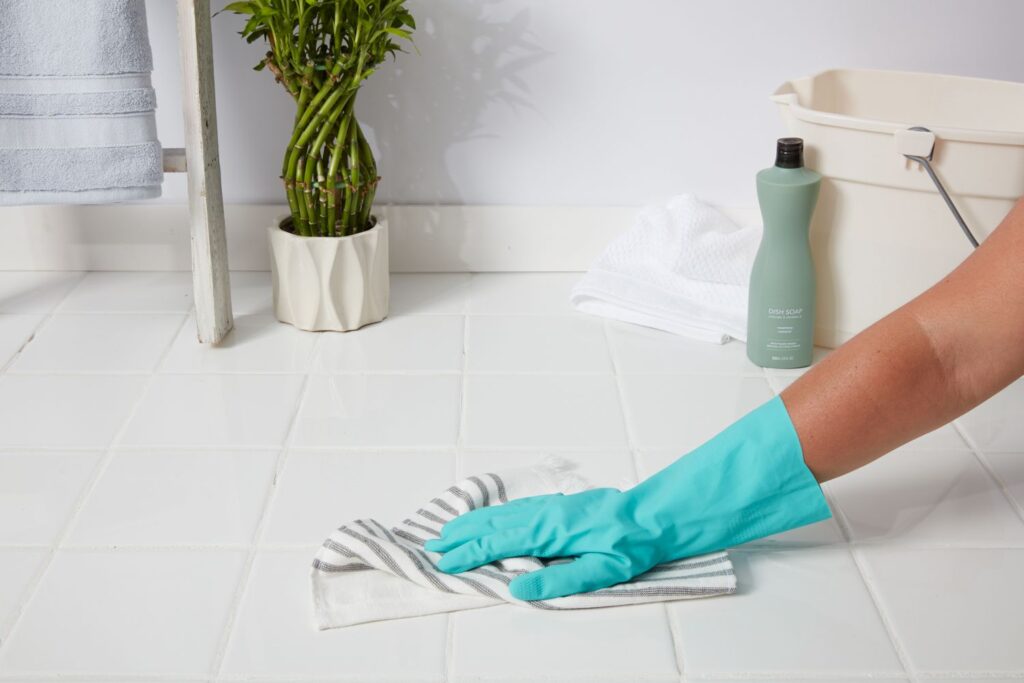
Ceramic and porcelain floor tiles are the easiest to clean, however, it’s sometimes difficult to detect the accumulation of filth under your feet. To clean ceramic or porcelain tiles, you may use almost any sort of cleanser, whether it’s all-purpose, dish soap, or plain white vinegar—tiles are resistant to scratching and losing their luster.
DIY techniques to clean your floor tiles

1. Vacuum or Sweep the Floor tiles

Ensure that you reach into the corners, where dirt likes to accumulate. A microfiber duster efficiently collects dust and hair.

2. Combination of Cleaner and Warm Water

Dip a rag or chamois mop into the solution—not a sponge mop. Squeeze out extra water until the fabric is wet but not soaked.

3. Distribute the Mop in Even, Gentle Strokes Across the Floor

As you travel across the area, follow a routine to ensure that no inch of the floor is ignored.

4. Replace Water on a Regular Basis

The water will naturally get cloudier as you rinse the mop or cloth. Regularly drain and replace the filthy water to prevent creating a hazy layer of grit on the floor tiles. If you finish and notice the haze, make a solution of white vinegar and hot water and wipe the film away with a moist towel.

5. Clean the Grout Spray 

The grout with a grout cleaner or make a bleach solution (using gloves to avoid getting bleach on your bare hands). Allow it to remain for a few minutes before rinsing.

6. With a Clean Cloth, Dry the Floor

If your floor tiles are prone to wet stains, dry them promptly after cleaning with a clean towel.

How to Clean Natural Stone or Marble Floor tiles

Marble, slate, or granite floor tiles may be cleaned in a similar fashion as porcelain and ceramic tiles, with the following exceptions:

  • When sweeping natural stone floor tiles, use a soft-bristled broom, since they scratch much more readily than ceramic or porcelain. 
  • Use the proper sort of cleanser for the floor: Slate and marble tiles are incompatible with acidic substances such as vinegar, while granite tiles need a pH-neutral, mild detergent to prevent staining.

Cleaning Vinyl or Linoleum Tile Flooring

While vinyl and linoleum flooring are less costly than stone or ceramic tiles, maintenance is just as critical. While a steam mop may seem to be a convenient shortcut, vinyl and linoleum are not designed to handle excessive heat and dampness.

  • Vinyl: Mop with a manufacturer-recommended cleaning solution or a solution of water and vinegar after sweeping. Avoid using abrasive cleaners on the flooring, as they might damage it.
  • Linoleum: After sweeping, clean with a linoleum-specific solution or a solution of borax and water. Apply a layer of wax and buff the floor every three to six months to retain the sheen.
DIY techniques to clean your floor tiles

Taking Stains Out of the Grout

Grout, particularly light-colored grout, is prone to staining. If you are unable to remove the stain with normal cleaning, mix a paste of baking soda and water. Allow it to settle for a few hours—or even overnight—before scrubbing the stain with a nylon brush (or, in a pinch, an unused toothbrush).

While some may propose utilizing a steam cleaner to remove grout stains, steaming the grout on a regular basis for an extended period of time may cause harm to the grout. To prevent any danger, use a baking soda paste and, once clean, cover the grout with a silicone-based sealant.

Floor tiles is becoming a more popular option for flooring in kitchens, bathrooms, living rooms, and other areas of the house. They are elegant and provide an easy-to-clean, long-lasting alternative to carpeting. Tile flooring, on the other hand, may reveal it with a little wear and tear. They collect dirt and filth, which discolors, stains, and detracts from the elegance of your home’s décor. The most typical causes of staining and discoloration on floor tiles are as follows:

  • Daily exposure to water, dust, dirt, and other liquid spills 
  • Excessive moisture and lack of air, which promote mold and mildew growth 
  • Porous grout that collects spills more readily

How Do Homeowners Take Care of Floor tiles?

While routine sweeping and mopping of floor tiles is a necessary element of home maintenance, it is sometimes insufficient to avoid dull, dusty floor tiles. To maintain their luster, tile flooring needs a little extra delicate loving care (TLC). Consider the following advice from Rainbow International to help maintain the brilliance of floor tiles:

  • Immediately clean up spills to prevent discoloration of the grout or floor tiles.
  • Frequently sweep or vacuum the tile floor to remove dirt and prevent it from drying on the floor tiles or being crushed into the tile by foot movement.
  • After washing the tile floor, rinse it well with water to eliminate any detergent residue.
  • Avoid using strong chemicals on the tile floor, such as bleach or other cleaners, since they may harm the sealant.
  • After showering or bathing, always rinse or wipe off bath tiles to eliminate any remaining soap scum or moisture to avoid mold and mildew. Click here to read about Some uncommon ways to vet floor tiles.

Final thoughts 

If you’ve been sourcing for ways to clean your floor tiles without many expenses, this article will steer you in the right direction. In summary, we talked about the simple ways you can clean your floor tiles. Feel free to revisit this article for proper grasping. 

Some uncommon ways to vet floor tiles

You’ve purchased the most exquisite floor tiles and are ready to create the floor of your dreams. Take a moment to count to 10. Installing floor tiles properly is just as critical as picking the perfect tile, since a sloppy job may detract from the elegance of your very costly floor tiles. Premium-quality floor tiles, along with proper application methods and craftsmanship, result in long-lasting flooring. A competent tile contractor is critical to ensuring a smooth and professional installation. Here are some pointers on what to watch out for.

Examine the floor tiles

Before beginning the tile installation, inspect the floor tiles for damage, discoloration, or shade variation. Replace damaged floor tiles promptly. Ascertain that the contractor handles the floor tiles with care to prevent damage.

Some uncommon ways to vet floor tiles

Nota bene: During the floor tile installation process, waste occurs while cutting floor tiles for the floor’s perimeter. If there is insufficient room for a whole tile, the floor tiles must be trimmed to fit. It is critical to purchase at least 10% more floor tiles to account for this waste.

Additionally, keep one or two boxes of extra floor tiles on hand after the flooring installation to ensure that if any damage occurs in the future, you have the precise floor tiles to replace.

  • Ensure that the surface is properly prepared
  • Repair and level the floor to provide a smooth surface for adhering the floor tiles; • Ensure that the surface is clean, dry, and dust-free. There should be no loose debris in the area (such as hardened cement grains).
  • Chip the walls up to a height of 4-6 inches (as required) above the floor in preparation for placing the skirting floor tiles.

Select a floor pattern

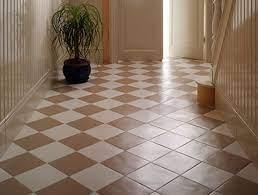
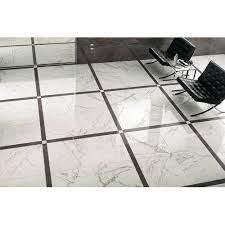
If you want to mix and match two or three different kinds of floor tiles, as seen in this figure, it is critical to create a paper blueprint for the tiling scheme. Allow the tiling contractor to arrange these floor tiles in advance to prevent errors during the final tile installation.

When installing floor tiles with a consistent design – for example, when laying the same kind of vitrified floor tiles throughout the property – ensure that the contractor arranges the floor tiles in such a manner that the least amount of tile is cut and wasted.

If you want to mix and match two or three different kinds of floor tiles, as seen in this figure, it is critical to create a paper blueprint for the tiling scheme. Allow the tiling contractor to arrange these floor tiles in advance to prevent errors during the final tile installation.

Inspect the tile installation procedure 

  • Allow at least 30 minutes for the floor tiles to soak in water. Keep in mind that if glue is placed to a dry tile, the dry tile may absorb all of the adhesive’s moisture, resulting in poor tile adhesion
  • Ensure that the contractor mixes just a little amount of adhesive with water, about as much as will be needed within 30 minutes, to minimize waste.
  • The contractor should leave a gap of 1-2 millimetres between the floor tiles for grouting, or alternatively, spacers should be used between the floor tiles to provide an equal spacing between each tile.
  • Insist that the contractor install the skirting immediately after the floor tiles are installed, in order to fill any gaps between the floor tiles and the wall.
  • The contractor should not apply the grout until the tile adhesive has solidified for at least 24 hours.

Additionally, for 24 hours, do not allow anybody to walk on the newly installed floor tiles. You can read about The DIY way to install porcelain tiles by visiting http://diy-home.info/the-diy-way-to-install-porcelain-tiles/

Finish the grouting

Prior to the contractor applying the grout, inspect and ensure that the grout color matches the tile color.

Wipe down the floor tiles

Once the grout has been set, ensure that the contractor cleans the floor tiles with a damp cloth or sponge soaked in diluted soap solution or water to remove any haze or residue left by the grout.

Take note: The contractor should avoid using any acidic or harsh soap-based cleansers that might cause harm to the floor tiles.

Some uncommon ways to vet floor tiles

Finally, inspect the installation of the floor tiles.

This may be determined by tapping the floor tiles; a hollow sound indicates that the tile has come loose from the subfloor or tile glue. If you discover any such fault, immediately request that the contractor replace those floor tiles.

Now you’ve completed your tile installation project!

How To Construct The Optimal Floor Tile Installation

Are you in the market for new floor tiles? While it’s natural to be distracted by gorgeous planks and sleek slabs, it’s critical to keep in mind what lies underneath. That is not the Harrison Ford horror flick with THAT conclusion! Rather than that, what lies underneath your new floor tiles is equally as significant as the floor tiles themselves. And, although each area is unique, there are a few general guidelines to follow to ensure that everything is in order down there. Even if you hire an expert, we encourage reading on to avoid unpleasant surprises at the conclusion.

Layout Your Workspace

When it comes to tiling floors, failing to plan is almost guaranteed to result in failure. The first step is to plan meticulously – so grab a notebook, dust up your pencil, and draw out your favorite layouts. Consider where grout lines and cuts will fall; you’ll want your space to seem balanced and symmetrical; you’ll also want to account for door thresholds and floor obstacles.

Once you’re satisfied, it’s good testing the arrangement by dry-laying the floor tiles. If you’re utilizing ornamental floor tiles, this is also a good time to experiment with various designs. And who said tiling couldn’t be enjoyable!

Height of the finished floor

Simultaneously, you’ll need to evaluate the build-up of your floor. Backing boards, underfloor heating mats, and glue may easily add an inch to the depth of your substrate, even before the depth of your floor tiles is considered. If you’re remodeling a room, you may need to shave the bottoms of your doors or adjust the levels of any worktops or cabinets to accommodate this additional height.

The DIY way to install porcelain tiles

There is no surprise that more and more people are attempting their own DIY porcelain floor tiles installations, given the seemingly endless stream of television shows dedicated to home buying, decorating, and remodeling that are currently on the air. And it’s not difficult to understand why porcelain floor tiles are one of the most popular surfaces available on the market right now. Indeed, it comes in a variety of sizes, colors, textures, and patterns that cover the entire design spectrum from traditional to contemporary and everything in between.

tiles

Porcelain floor tiles, which are equally essential, are attractive, inexpensive, durable, simple to clean, and almost completely maintenance-free! Because of this, it is ideal for a variety of projects such as floors, countertops, accent walls, showers, backsplashes, and many others.

Floor tiles are no longer restricted to the kitchen and bathroom; with its contemporary designs and sumptuous patterns, porcelain is equally at home in foyers and elegant living rooms. You should follow this expert installer’s advice if you want to perform your next porcelain floor tiles job yourself in order to avoid making typical (and sometimes expensive) floor tiles installation blunders.

Pro Tip #1: Make sure your floors are level and that your underlayment is correctly prepared to save time and hassle.

Living in an older house or condo means that you can pretty much count on finding flooring that isn’t precisely level and walls that aren’t completely plumb at some point. Make sure to take care of these issues before you begin installing your porcelain floor tiles, or you may end up putting the whole job at risk.

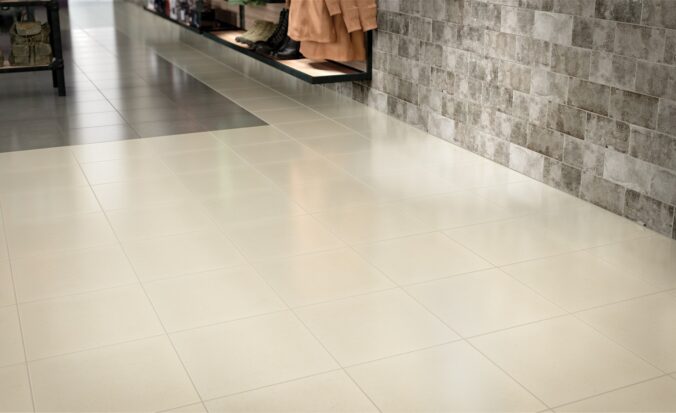
For example, in this sun-drenched space, an uneven floor and improperly prepared underlayment could cause these large, beautiful Silt Capella Porcelain Floor tiles to become uneven, posing a trip hazard to those walking on them. As an added precaution, since many walls aren’t perfectly level, you should always begin putting wall tile in the middle of the room and work your way outward. This will guarantee that the completed product maintains the integrity of the pattern that you wanted to use.

The DIY way to install porcelain tiles

Pro Tip #2: Before you begin installing the floor tiles, make sure it is completely laid out in your area.

This provides you with the opportunity to experiment with a variety of patterns and determine which layout direction best complements both the overall space and the floor tiles pattern in question. In expansive settings where active kitchens flow into relaxing living spaces, porcelain floor tiles are a great choice for the floors and walls. Also, while deciding which floor tiles are ideal for the kitchen, be sure to choose one that is simple to clean and that is slip-resistant when wet when you are making your decision. These matte-finished big format porcelain tiles serve as the focal point of this contemporary area, bringing the room’s contemporary style together.

Pro Tip #3: Spread thin-set evenly throughout the surface and be sure you use plenty of it.

The aesthetic of reclaimed wood is one of the biggest trends right now, and this earthy and warm living area is a great example of that. Our Copper Vintage Wood Look Porcelain Floor tiles have a design evocative of reclaimed hardwood boards, right down to the saw-hewn texture, which gives it a depth of character that cannot be ignored.

A tragedy would be to have floor tiles pop up or break after all of the effort and money that has gone into this installation, and unfortunately, this is precisely what may happen if not enough thin-set is put equally throughout. Please take your time. Make use of a level as you go, and if you’ve done a good job of preparing your underlayment, there shouldn’t be any surprises. Visit http://diy-home.info/some-uncommon-ways-to-vet-floor-tiles/ to read about Some uncommon ways to vet floor tiles.

Pro-Tip #4: Take your time with the curing process.

After you’ve completed the installation of your lovely floor, it’s tempting to just tiptoe across the room to enjoy your accomplishment. Refrain from giving in to the temptation! Thinset requires time to cure (usually 24 hours or more); stepping on it too quickly can cause the tiles to move, resulting in the pattern being ruined. The lifelike veining gives this tile its unique personality, and even a single slid porcelain floor tile would spoil the whole impression of the design.

The warm tones and strong oak veins of this tile are the ideal complements to the towering white walls in this space. They provide much-needed natural texture to the room, which helps to warm it up. Once the floor has dried fully, you will have plenty of time to appreciate your hard work and creativity. You only need to be patient and follow the recommendations to ensure that your thin-set and grout are properly cured…

Pro Tip #5: Make a plan for entrances, outlets, windows, and lighting before you start building.

Until now, we’ve just spoken about porcelain floor tiles installation on floors, but now it’s time to talk about porcelain floor tiles installed on walls as well. Porcelain floor tiles are utilized on both the floor and the walls of this delightful bathroom, which has exquisite Tiles and Bath co Floor tiles. This kind of construction requires meticulous attention to detail in order to ensure that the joints and grout lines are perfectly aligned from floor to ceiling.

Naturally, there will be difficulties along the way, as you could anticipate. It is quite easy to get disoriented by a toilet, recessed walls, or other fixtures in a room. In contrast to a large living area with infinite rows of uncut tiles, a small bathroom requires additional time, patience, and a great deal of planning and preparation in advance to ensure a successful tiling job.

Ceramic floor tiles installation is an art, and it takes a lot of experience to become proficient. However, this does not rule out the possibility of achieving professional-looking outcomes on a budget. Remember to follow our five porcelain floor tiles installation instructions to help ensure the success of your job.